flutter开发实战-图片缩放裁剪框图片裁剪功能
在开发中,需要选择相册的图片进行裁剪出图片的一小块内容作为目标图片,如上传头像,就是在用户选择头像后,根据裁剪狂来裁剪出所需要的图片进行上传。这里记录一下使用extend_image实现的图片缩放裁剪框图片裁剪功能。
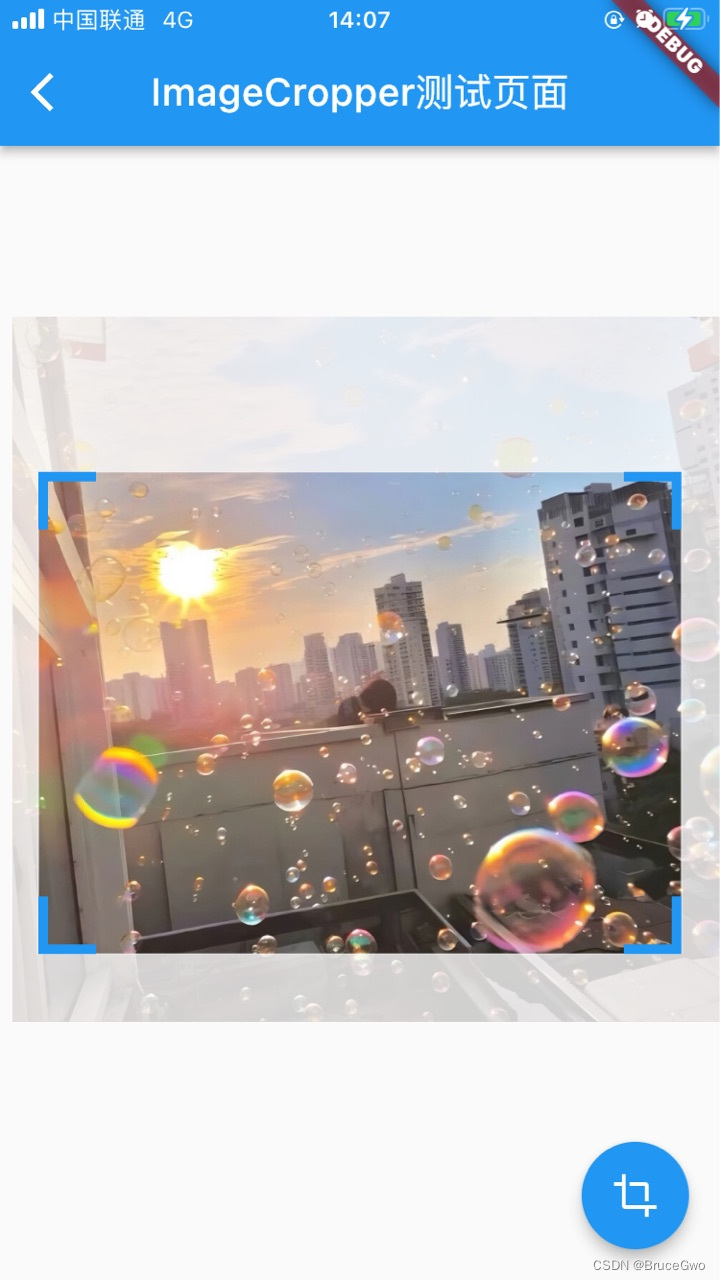
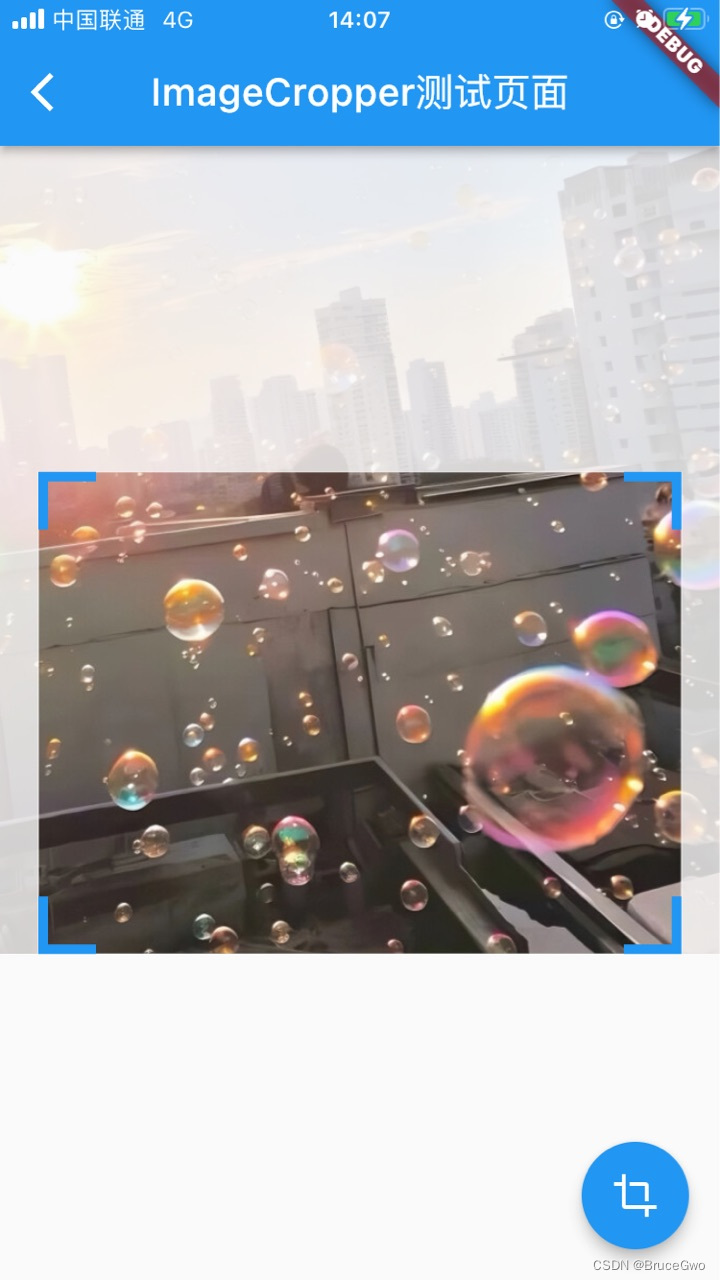
一、整体效果
图片裁剪可以缩放图片,裁剪出图片的一部分,也可以拖动裁剪框,裁剪出所需要的图片的一部分内容。
如下图所示
extend_image_10">二、使用extend_image来实现裁剪
这里使用的是extend_image插件
2.1 引入所需要的库
在工程的pubspec.yaml引入所需要的库
  # 路径path
  path_provider: ^2.0.15
  # image_editor
  image_editor: ^1.0.2
  # extended_image
  extended_image: ^7.0.2
我这里使用到了三个组件
- path_provider
路径path - image_editor
图片编辑与裁剪 - extended_image
图片扩展的,可缩放
2.2 代码实现
使用extended_image来展示可缩放的裁剪框,这里需要设置mode为ExtendedImageMode.editor.
设置初始化的EditorConfig
initEditorConfigHandler: (ExtendedImageState? state) {
            return EditorConfig(
                maxScale: 4.0,
                cropRectPadding: const EdgeInsets.all(20.0),
                hitTestSize: 20.0,
                initCropRectType: InitCropRectType.imageRect,
                cropAspectRatio: CropAspectRatios.ratio4_3,
                editActionDetailsIsChanged: (EditActionDetails? details) {
                  //print(details?.totalScale);
                });
          },
完整代码如下
import 'dart:io';

import 'package:extended_image/extended_image.dart';
import 'package:flutter/foundation.dart';
import 'package:flutter/material.dart';
import 'package:flutter_app_demolab/crop_editor_helper.dart';
import 'package:path_provider/path_provider.dart';

class ImageCropper extends StatefulWidget {
  const ImageCropper({super.key});

  @override
  State<ImageCropper> createState() => _ImageCropperState();
}

class _ImageCropperState extends State<ImageCropper> {
  final GlobalKey<ExtendedImageEditorState> editorKey =
  GlobalKey<ExtendedImageEditorState>();
  bool _cropping = false;

  @override
  Widget build(BuildContext context) {
    return Scaffold(
        appBar: AppBar(
          title: Text("ImageCropper测试页面"),
        ),
        body: ExtendedImage.network(
          'https://c-ssl.dtstatic.com/uploads/blog/202310/26/5zSdYLmWhOYYZxZ.thumb.1000_0.jpeg',
          fit: BoxFit.contain,
          mode: ExtendedImageMode.editor,
          enableLoadState: true,
          extendedImageEditorKey: editorKey,
          cacheRawData: true,
          //maxBytes: 1024 * 50,
          initEditorConfigHandler: (ExtendedImageState? state) {
            return EditorConfig(
                maxScale: 4.0,
                cropRectPadding: const EdgeInsets.all(20.0),
                hitTestSize: 20.0,
                initCropRectType: InitCropRectType.imageRect,
                cropAspectRatio: CropAspectRatios.ratio4_3,
                editActionDetailsIsChanged: (EditActionDetails? details) {
                  //print(details?.totalScale);
                });
          },
        ),
      floatingActionButton: FloatingActionButton(
          child: const Icon(Icons.crop),
          onPressed: () {
            cropImage();
          }),
    );
  }

  Future<void> cropImage() async {
    if (_cropping) {
      return;
    }
    _cropping = true;
    try {
      final Uint8List fileData = Uint8List.fromList((await cropImageDataWithNativeLibrary(
          state: editorKey.currentState!))!);
      // 图片保存到本地
      saveImage(fileData);
      // final String? fileFath =
      // await ImageSaver.save('extended_image_cropped_image.jpg', fileData);
      // print('save image : $fileFath');
    } finally {
      _cropping = false;
    }
  }

  void saveImage(Uint8List imageByte) async {
    var tmpDir = await getTemporaryDirectory();
    var file = await File("${tmpDir.path}/image_${DateTime.now().microsecond}.jpg").create();
    file.writeAsBytesSync(imageByte);
    print("saveImage file:${file.path}");
    int length = await file.length();
    print('saveImage file length:${length}');
    // Uint8List readImageData = await file.readAsBytesSync();
  }
}
使用image_editor来实现图片的裁剪功能,这里用到了Android与iOS的裁剪部分。
具体代码如下
import 'dart:ui';

// import 'package:isolate/load_balancer.dart';
// import 'package:isolate/isolate_runner.dart';
import 'package:extended_image/extended_image.dart';
import 'package:flutter/foundation.dart';
import 'package:image_editor/image_editor.dart';

Future<Uint8List?> cropImageDataWithNativeLibrary(
    {required ExtendedImageEditorState state}) async {
  print('native library start cropping');
  Rect cropRect = state.getCropRect()!;
  if (state.widget.extendedImageState.imageProvider is ExtendedResizeImage) {
    final ImmutableBuffer buffer =
        await ImmutableBuffer.fromUint8List(state.rawImageData);
    final ImageDescriptor descriptor = await ImageDescriptor.encoded(buffer);

    final double widthRatio = descriptor.width / state.image!.width;
    final double heightRatio = descriptor.height / state.image!.height;
    cropRect = Rect.fromLTRB(
      cropRect.left * widthRatio,
      cropRect.top * heightRatio,
      cropRect.right * widthRatio,
      cropRect.bottom * heightRatio,
    );
  }

  final EditActionDetails action = state.editAction!;

  final int rotateAngle = action.rotateAngle.toInt();
  final bool flipHorizontal = action.flipY;
  final bool flipVertical = action.flipX;
  final Uint8List img = state.rawImageData;

  final ImageEditorOption option = ImageEditorOption();

  if (action.needCrop) {
    option.addOption(ClipOption.fromRect(cropRect));
  }

  if (action.needFlip) {
    option.addOption(
        FlipOption(horizontal: flipHorizontal, vertical: flipVertical));
  }

  if (action.hasRotateAngle) {
    option.addOption(RotateOption(rotateAngle));
  }

  final DateTime start = DateTime.now();
  final Uint8List? result = await ImageEditor.editImage(
    image: img,
    imageEditorOption: option,
  );

  print('${DateTime.now().difference(start)} :total time');
  return result;
}
这里可以根据旋转,flip翻转等来进行设置编辑的imageEditorOption。
最后在我们需要将裁剪后的图片保存到本地目录,这里就需要用到了File
保存代码如下
  void saveImage(Uint8List imageByte) async {
    var tmpDir = await getTemporaryDirectory();
    var file = await File("${tmpDir.path}/image_${DateTime.now().microsecond}.jpg").create();
    file.writeAsBytesSync(imageByte);
    print("saveImage file:${file.path}");
    int length = await file.length();
    print('saveImage file length:${length}');
    // Uint8List readImageData = await file.readAsBytesSync();
  }
如果需要从本地读取图片,可以使用file.readAsBytesSync()。最后将Uint8List readImageData进行显示处理。
三、小结
flutter开发实战-图片缩放裁剪框图片裁剪功能
学习记录,每天不停进步。